Create and save columns in Elicit
Create a column for each data point you'd like to extract from your papers. Columns can pull data from the papers' body text or from tables in the papers.
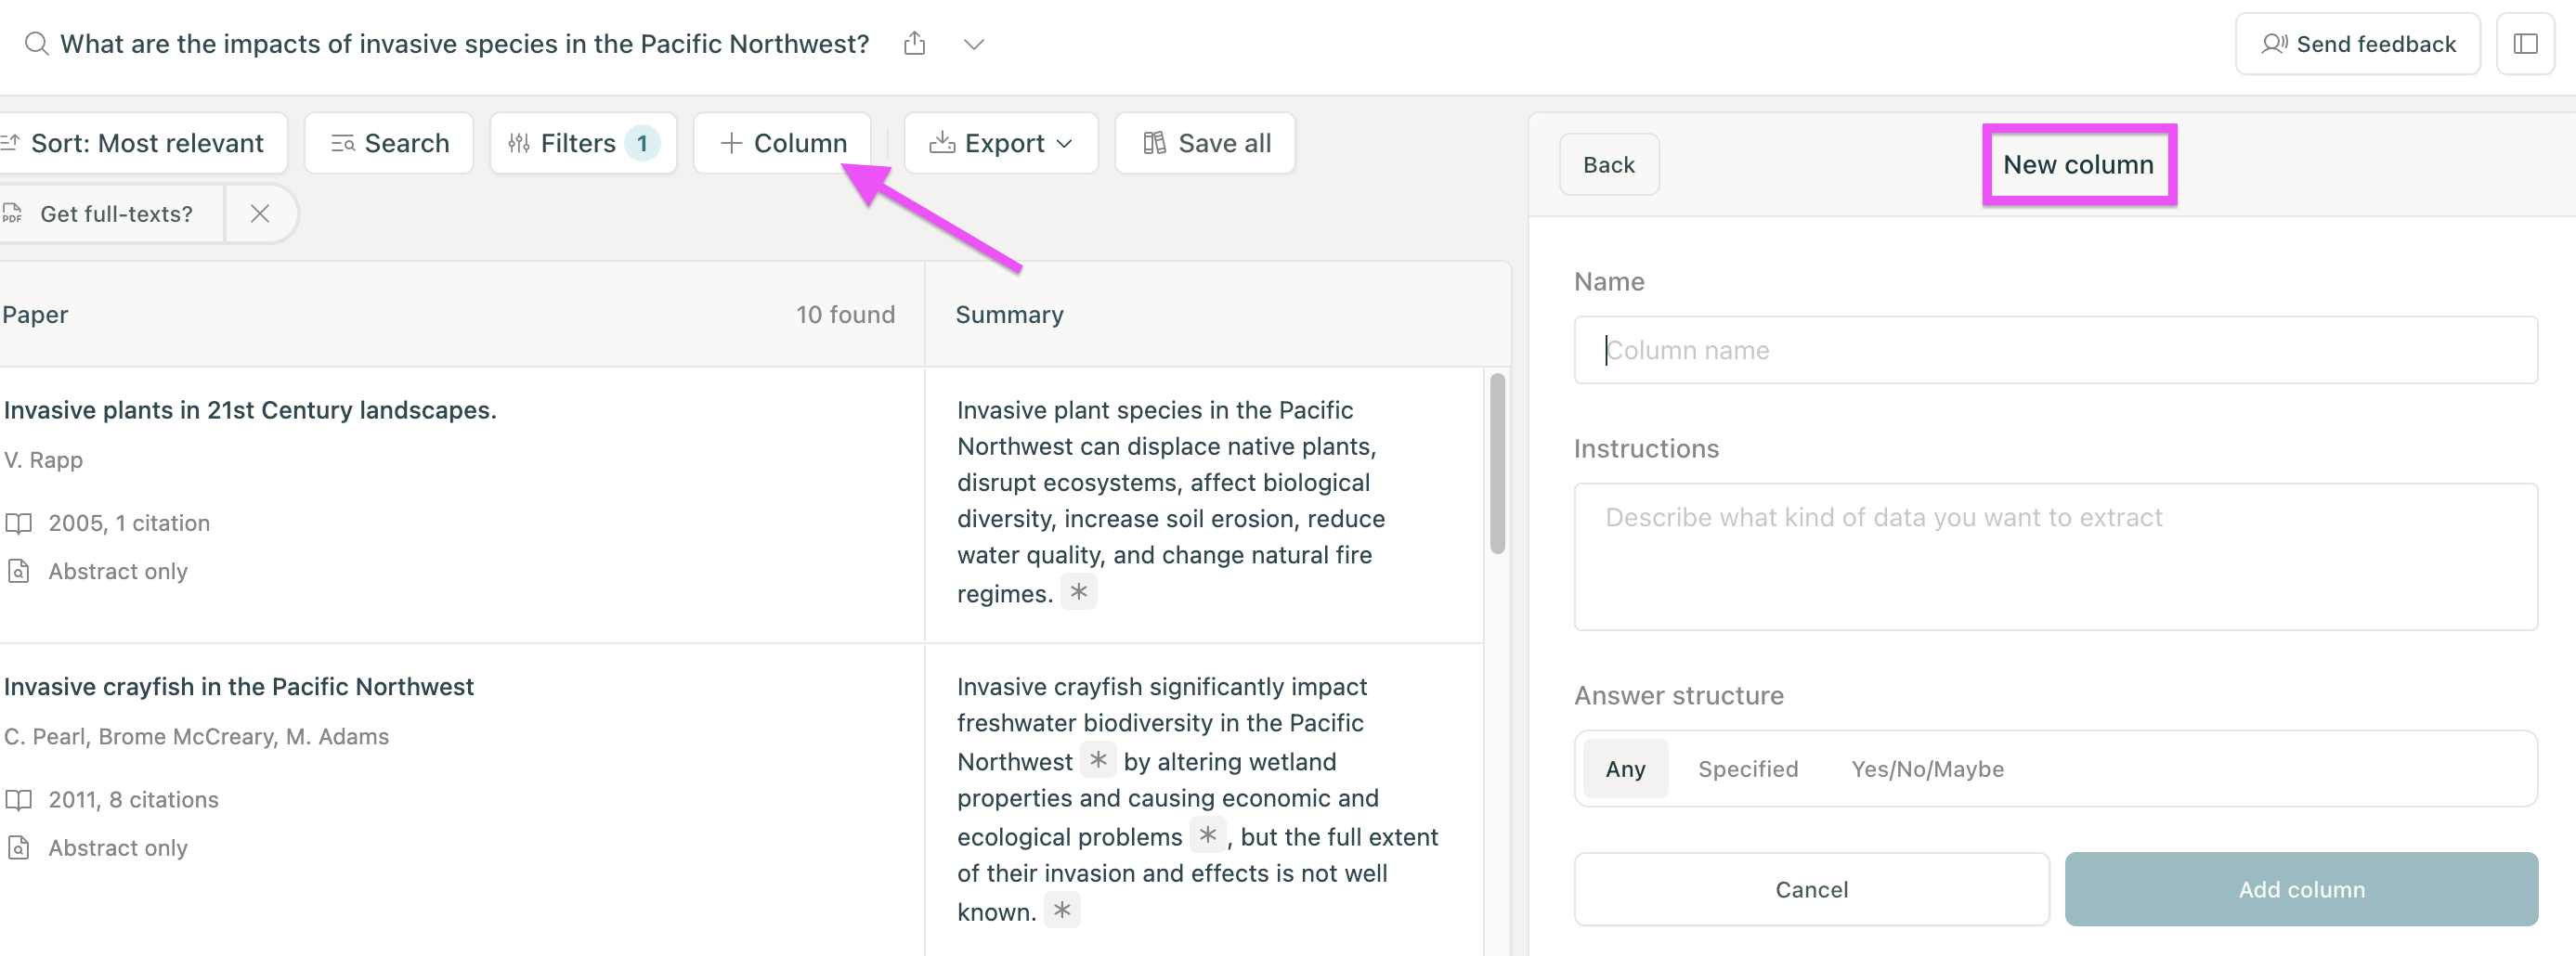
To create a column, click the Column button at the top of the table:
The Name should a single phrase describing what information you want to extract from the papers in your table, e.g. “Main or primary outcome measured in the study.”
The Instructions tell Elicit how to get the information you want.
The instructions should contain all instructions that you’d give to a human data labeler.
The instructions can accept multiple paragraphs of input, so don’t worry about your instructions being too long.
Be as detailed as possible, e.g. “List all interventions that at least some participants received” may be better than “List the interventions that participants received.”
Explain the desired format of the answer, for instance:
Level of precision: “Be as precise as possible (i.e. ‘50 hours’ is better than ‘2 days’.)”
Multiple choice answers: “The answer should be one of: Both Genders, Male, or Female.”
Numerical formats: “Give your answer in the format ‘mean ± standard deviation’, e.g. ‘24.5 ± 3.0’.”
Units: “Include the units, e.g. ‘3.8 ml/kg’.”
Explicitly mention any gotchas, e.g. “Make sure to give the number of participants at the end of the study, not at some earlier point.”
Give examples of good answers.
Try editing the various predefined columns to see what they’re like to get ideas for your Description and Instructions!
Try out your column. If you still notice issues, go back to step 2 and tweak the Description and Instructions further. For column tips, see Improving Results from Columns.
Suggested Columns & Editing Columns
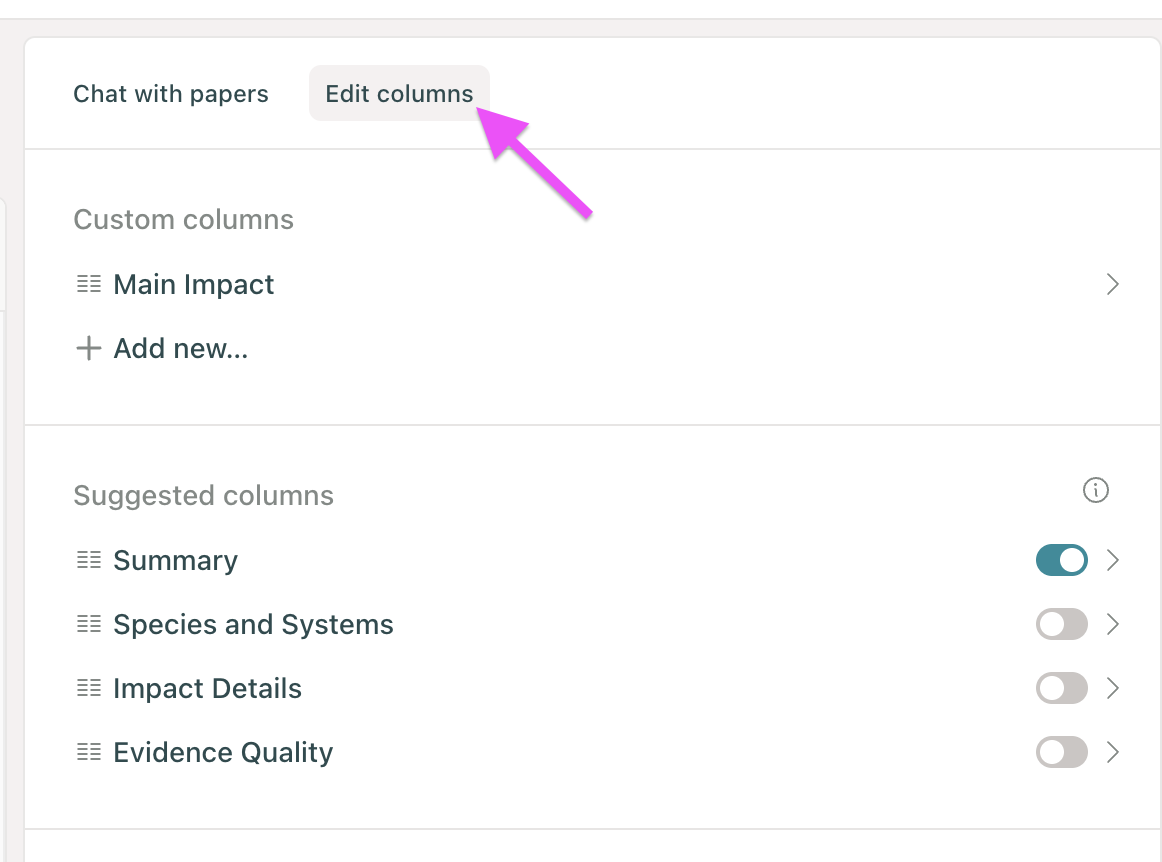
Elicit will suggest columns based on your research question. To view and add suggested columns, click the Edit Columns tab next to the Chat with Papers tab on the right sidebar:
Toggle columns on or off, edit columns by clicking the arrow next to the column, or add new columns.
Save columns for use in other workflows
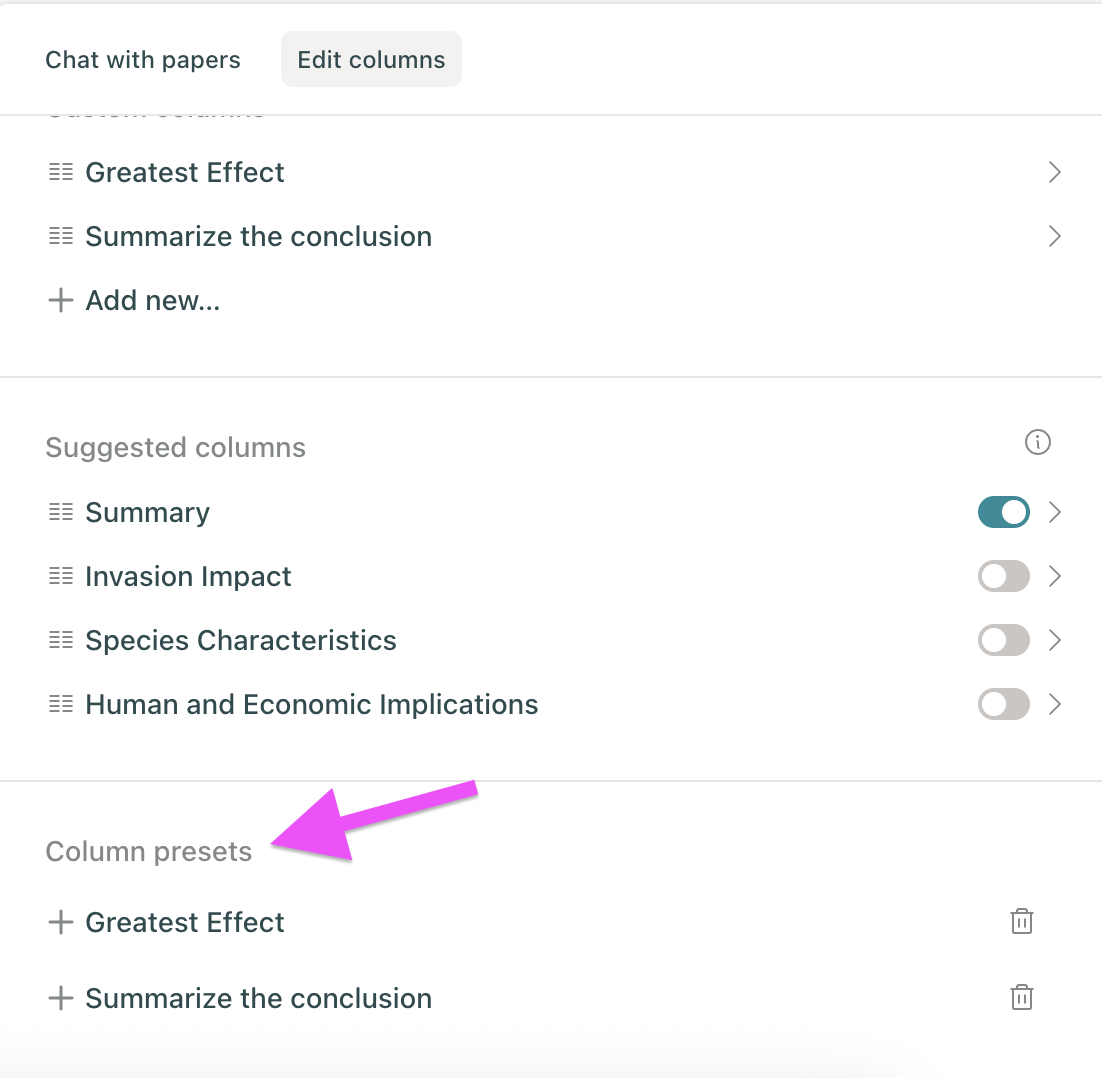
Any column can be saved as a "Preset" column in your workflows. Preset columns will then be available in other workflows under the preset section.
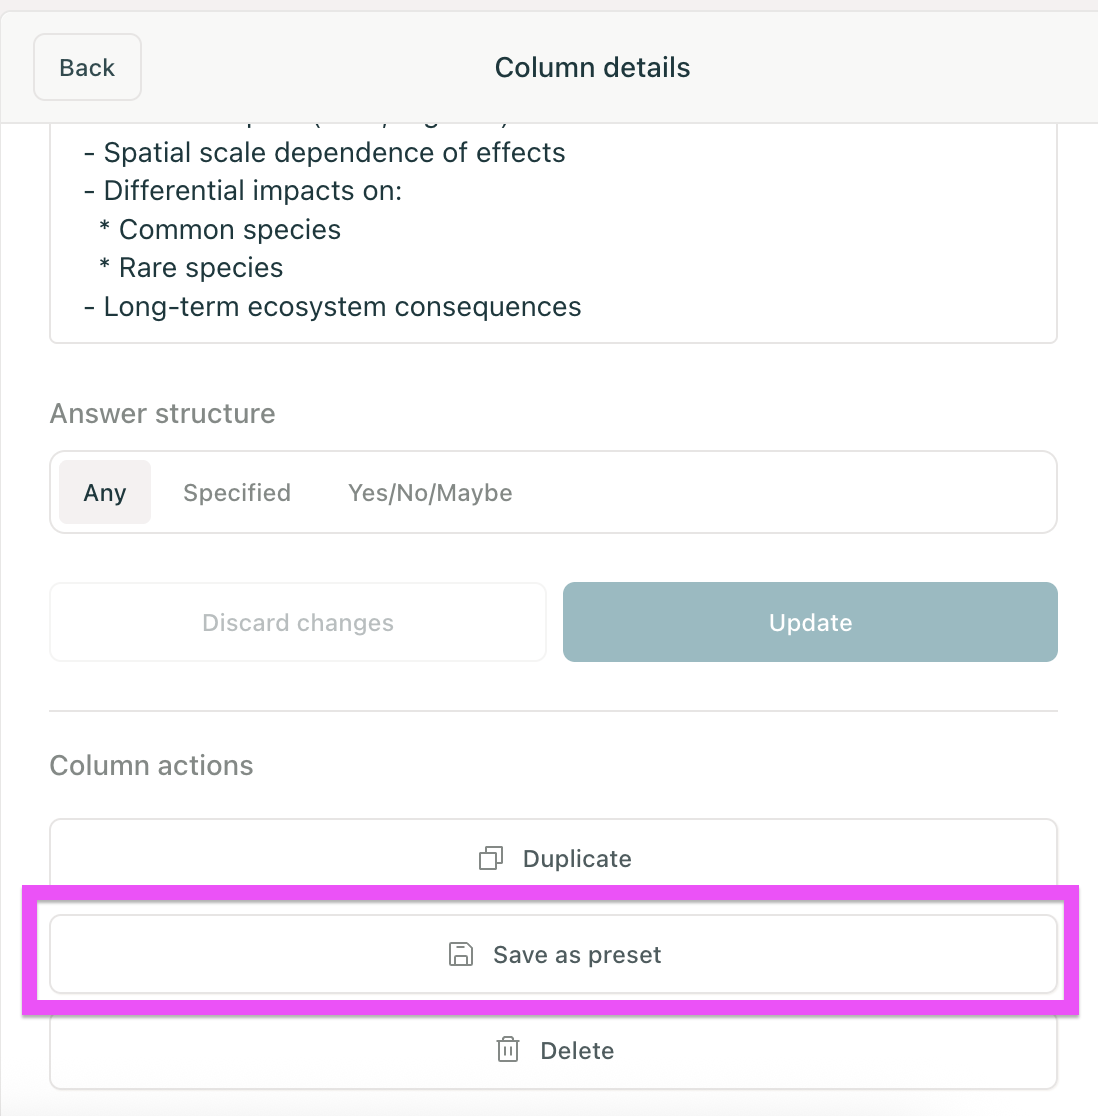
To save a column as a preset column, click the arrow next to the column to edit it. Then click the Save as Preset button:
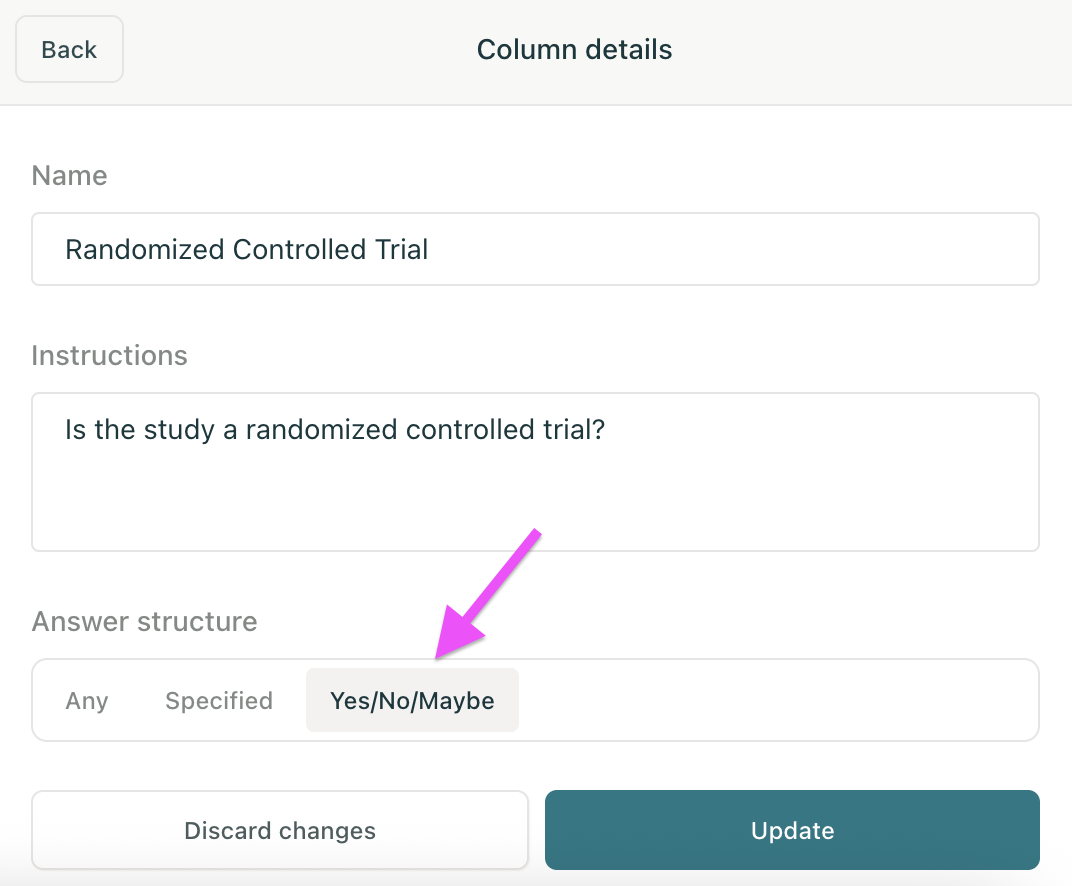
Yes/No/Maybe Columns
Use the Yes/No/Maybe option to create columns to answer yes or no questions about the papers in your table. These columns are great for screening papers to include in systematic reviews or to weed out papers that don't meet your specific research criteria.
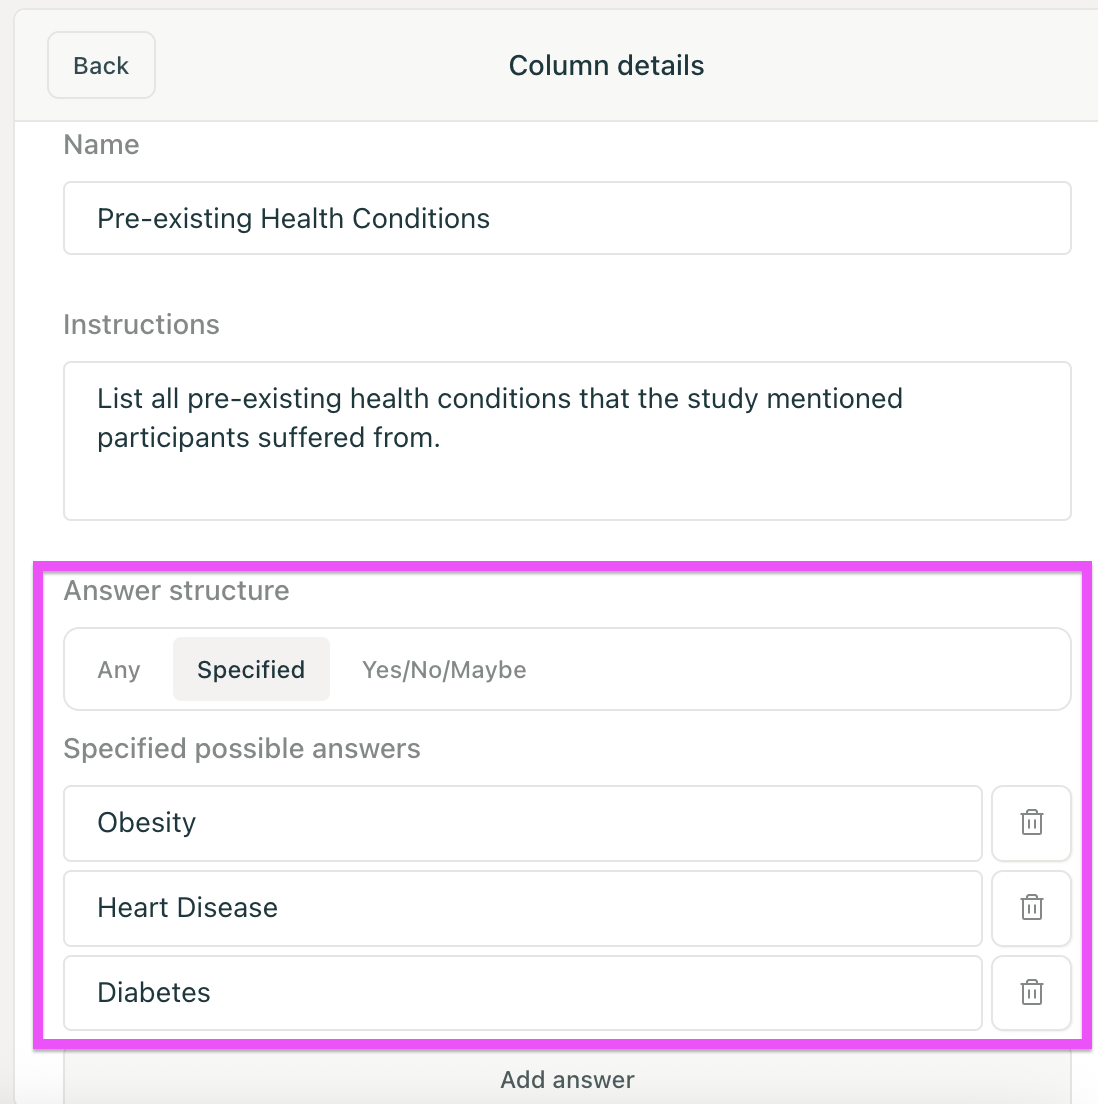
Multiple-Choice Columns
Specified answers from a multiple-choice list are helpful when you know what all of the possible answers are, and you just want Elicit to choose from that set. To create multiple choice questions, use the “Specified” answer structure:
Elicit will choose answers from your list of specified answers:

